Nottingham Family Photographer
Simple, easy and beautiful Easter DIY home decorations for kids
Looking for an ideas for Easter Diy home decoration, that you can make with your kids and make your home beautiful for this Easter?
My family loves crafting and every free moment when we are not traveling or renovating something, then we make crafting.

This time I have prepared for you 3 DIY Easter ideas for simple decorations that you can do together with your children. When making home decorations with children, I try to ensure that they match the decor of the house. I treat home decorations a bit differently than usual crafting with children.
Remember
Remember that when making DIY Easter home decorations, children will want to decorate the home with them. And I don’t know about you, but I can’t imagine a whole house decorated with paper decorations in saturated colors 🙂 at a party it doesn’t matter, but not really on a daily basis.


Cheap decorations are not the most beautiful in the world and the style does not always suit the interior. A simple method can turn them into stylish accessories and the children will have a lot of fun.
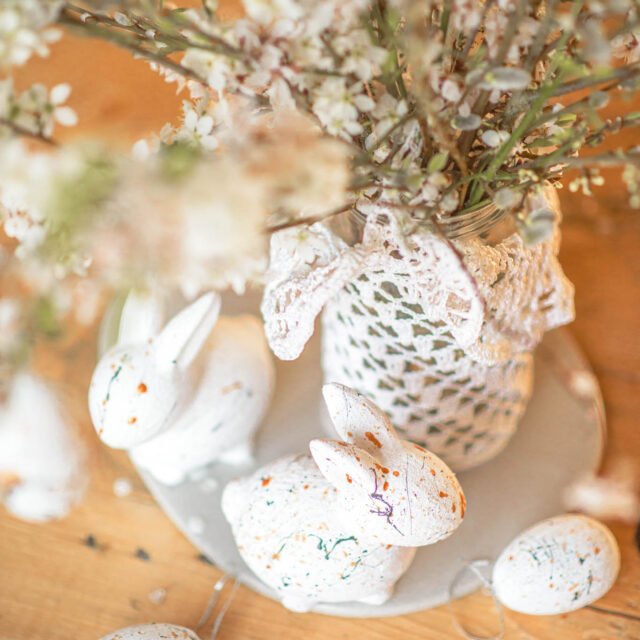
We bought a set of paint eggs and two ceramic bunnies. We used acrylic paints to decorate them: white, black and gold. (They were all available from Home Bargains) A brush (children can also use a toothbrush, smaller children will find it easier), a plastic paint plate and the most important ingredient in baking soda. This secret ingredient will change the structure of the paint (and the children will have fun with the new method;) You squeeze white paint onto a plate or bowl and add baking soda to it. The mixture should have the consistency of thick cream. We paint our Easter decorations with such a mixture.

Little advice
Little advice , we don’t need any water for the paint at this stage. When our decorations are dry, we squeeze black and gold paint on the plate, dip a brush or a brush in them and flick the paint on eggs or whatever you decorate. (A little tip for you, before the second stage, secure the place of your crafts well because the paint will be everywhere haha). The more motley the blobs of paint, the better the effect. Let your children run wild and be creative. Now it’s time to dry and voila, beautiful DIY Easter decorations for your home for Easter are ready.

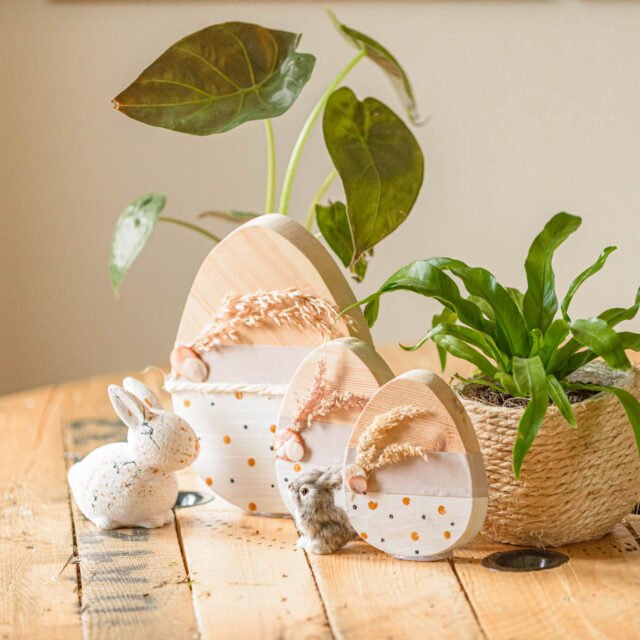
2. DIY wooden Easter decorations
My second suggestion for DIY Easter decorations are wooden, painted eggs. This time my husband came to the rescue, he cut 3 eggs for me from the remnants of wood that were left from various projects. Don’t worry, if you don’t have any, eggs cut from cardboard work just as well (and cardboard is easily available, just ask when shopping and they will give us a few)
Ok. So we already have our wooden / cardboard eggs. To decorate them, we need paint in selected colors (here we used the same colors as in the previous project), masking tape, brushes, a paint plate, a glue gun and everything that I got into my hands, which I attached at the end (in my case, dried grass, a piece of rope and buttons). You can use ribbons, buttons, feathers, anything you can think of. Masking tape we divided the surface of the egg into half, you can paint the whole egg if that’s the idea.
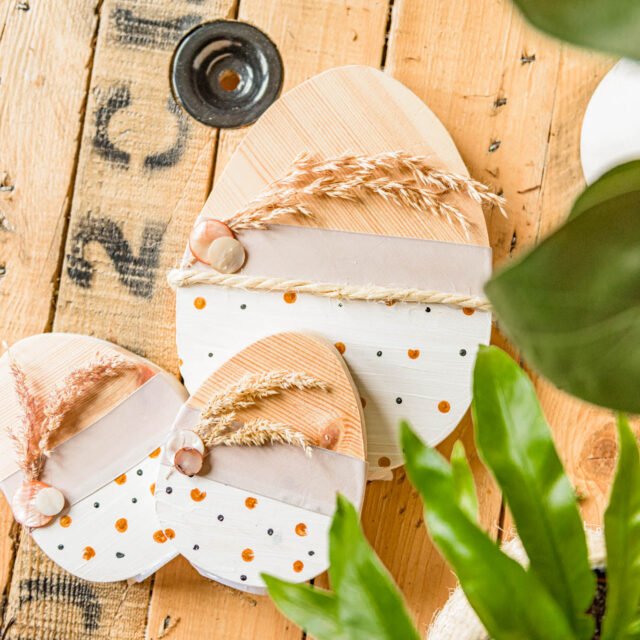
To make it easier
We painted the lower part of the egg with a paintbrush. We didn’t want to wait for the paint to dry, so we immediately added dots. To make it easier for children to do the task, we used a pencil with an eraser. We dipped the eraser in the paint and stamped it on the egg. We used a brush stick for the smaller dots, and the same method as with a pencil, we applied the paint on the eggs. Now we had to wait for the paint to dry, but don’t worry. Acrylic paints dry quickly.
Once our eggs are dry, it’s time to decorate them. My sons got tired of painting so I glued the last additions. If you are afraid to use a hot gun near the child, you can use a different glue. And it’s ready, another beautiful DIY decoration for Easter is ready.


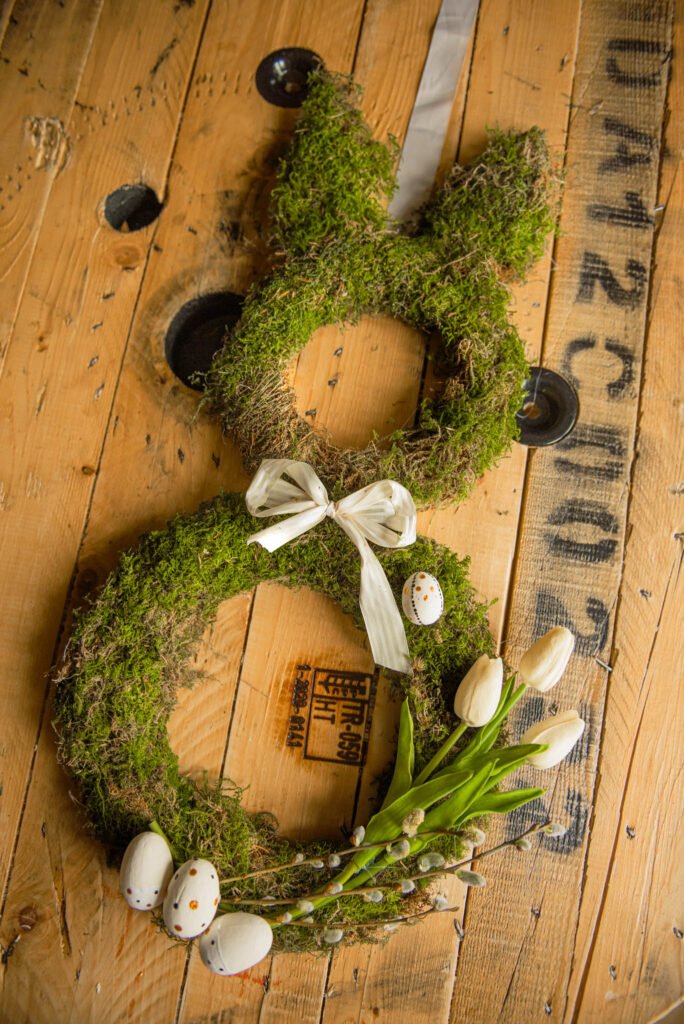
3. Easter rabbit made of moss.
It will be perfect as an ornament on the front door, but also as a wall decoration. This time the decoration requires a little preparation from us. You can order moss online, but you know you will wait a while before your order arrives. I suggest you go for a walk. In the UK I think moss grows everywhere haha, so you don’t have to look far. My tip, avoid collecting moss near Christmas trees, the moss will have a lot of needles and it won’t look nice. One day is enough to dry the moss and you can decorate it.
To make a moss rabbit, you need: cardboard, glue gun or other available glue, scissors or a sharp knife, ribbon and decorations with which you will decorate the rabbit.
Cut out
From the cardboard, cut out 4 circles (2 small and 2 large) and 2 ear shapes (usually triangles). I used plates of various sizes to draw the circles. Glue the circles together, the large ones together and the small ones together. This will strengthen the structures.


rabbit's construction
Then glue all the elements together, use the remains of the cardboard for this. Ok. Now that we have the rabbit’s construction ready, it’s time to start gluing the moss. It’s great fun, the moss has a very nice texture and the gluing itself is very relaxing for my children.
Let your imagination carry you
When the moss is in place, it’s time to decorate it with decorations, let your imagination carry you. Finishing our DIY Easter decorations is usually left for me, so I glued the last additions again. Finally, attach a ribbon on the back of the rabbit, which will make it easier to hang the ornament. Here is your lovely Easter bunny made of moss
I hope you had a great time and your house is beautifully decorated for Easter. If you have any questions, write to me and I will be happy to answer them.
Have a nice day guys! Happy Easter!
Ps. And if you are looking for ideas for fun during Easter and a half term, then please click here. Mega fun games and small tips on how to capture them in photos to keep these wonderful memories for years.